Introduction:
Reverb is the secret sauce that transforms dry sounds into immersive sonic landscapes, adding depth, dimension, and a touch of magic to your music. In this blog post, we’ll dive into the world of reverb within FL Studio, exploring techniques, tips, and creative approaches to harness the power of this essential audio effect for crafting rich and dimensional soundscapes.
Understanding Reverb in FL Studio:
Reverb, short for reverberation, simulates the reflection of sound waves in a space, creating the illusion of space and depth. FL Studio offers a versatile set of reverb tools, each with its unique features and sonic characteristics.
1. Fruity Reeverb 2: The Swiss Army Knife of Reverb:
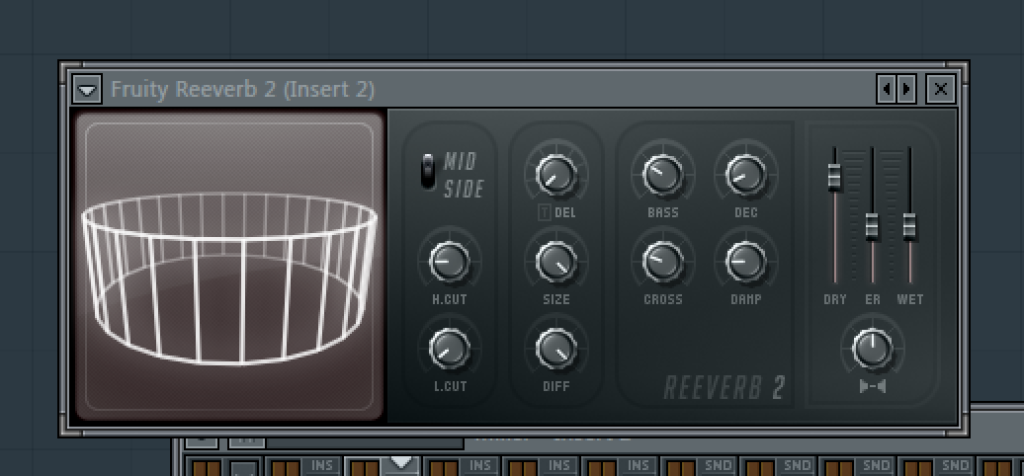
Fruity Reeverb 2 is FL Studio’s native reverb plugin, a versatile and powerful tool that caters to a wide range of applications. From subtle room ambience to expansive hall reverberation, Fruity Reeverb 2 is your go-to for adding spatial richness to your sounds.
2. Choosing the Right Type of Reverb:
FL Studio’s Fruity Reeverb 2 allows you to select different reverb algorithms, including Small Room, Medium Room, Large Hall, and more. Experiment with different types of reverb to match the desired spatial characteristics for your specific sounds. Consider the acoustics you want to emulate, from the intimacy of a small room to the grandiosity of a cathedral.
3. Tailoring Pre-Delay and Decay Time:
Precise control over pre-delay and decay time is crucial for shaping the character of your reverb. Pre-delay determines the time between the original sound and the onset of reverb, influencing the perceived distance. Decay time controls how long the reverb persists. Adjust these parameters to tailor the reverb’s timing to your track’s tempo and mood.
4. Utilizing High and Low Cut Filters:
To prevent muddiness and maintain clarity in your mix, leverage the high and low cut filters in Fruity Reeverb 2. Use these filters to sculpt the frequency range of the reverb tail, ensuring it complements your mix without interfering with the essential elements.

5. Creating Realistic Spaces with Stereo Separation:
The stereo separation parameter in Fruity Reeverb 2 allows you to control the spread of the reverb in the stereo field. Experiment with stereo separation to create realistic spatial impressions. Consider narrowing the stereo spread for mono sources and widening it for stereo sources to enhance the immersive quality of your reverbs.
6. Layering Reverbs for Complexity:
For added sonic richness and complexity, experiment with layering multiple instances of Fruity Reeverb 2. Apply different settings to each instance, combining short and long reverbs, or blending room and hall reverbs. Layering reverbs can yield intricate and textured soundscapes that captivate the listener.
7. Automation for Dynamic Movement:
Add a dynamic dimension to your mix by automating reverb parameters. Experiment with automating parameters like wet/dry mix, decay time, or stereo separation over time. This technique allows you to create evolving soundscapes, enhancing the emotional impact of specific sections in your composition.
8. Exploring Third-Party Reverb Plugins:
While Fruity Reeverb 2 is a powerful tool, don’t shy away from exploring third-party reverb plugins to expand your sonic palette. Plugins like Valhalla Room, FabFilter Pro-R, or Waves Abbey Road Reverb Plates can offer unique sonic characteristics and additional features that complement FL Studio’s native reverb.
Conclusion:
Reverb is the sonic architect’s tool for crafting spaces and breathing life into your music. In FL Studio, Fruity Reeverb 2 stands as a versatile companion, offering a range of tools to sculpt your desired sonic environments. Experimentation is key, so dive into the world of reverb, explore its nuances, and let your creativity soar in the vast and dimensional soundscapes you create. Happy reverberating!
