FL Studio is a powerful digital audio workstation (DAW) that allows you to create music with a wide range of features. One of the most important features in FL Studio is automation, which allows you to control various parameters of your tracks over time. This can be used to create more dynamic and interesting music, and to add special effects to your tracks.
In this blog post, we will discuss the different types of automation in FL Studio, how to create and edit automation clips, and some of the best practices for using automation.
Types of Automation
There are three main types of automation in FL Studio:
- Volume automation: This controls the volume of a track over time.
- Pan automation: This controls the panning position of a track over time.
- Parameter automation: This controls the value of any parameter of a plugin or effect over time.
Creating and Editing Automation Clips
To create an automation clip, simply right-click on the parameter you want to automate and select Create Automation Clip.
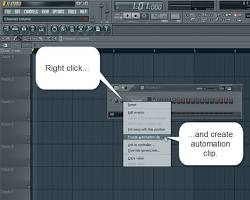
Create automation clip FL studio
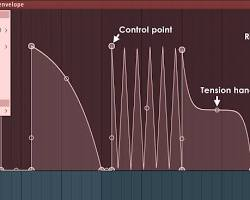
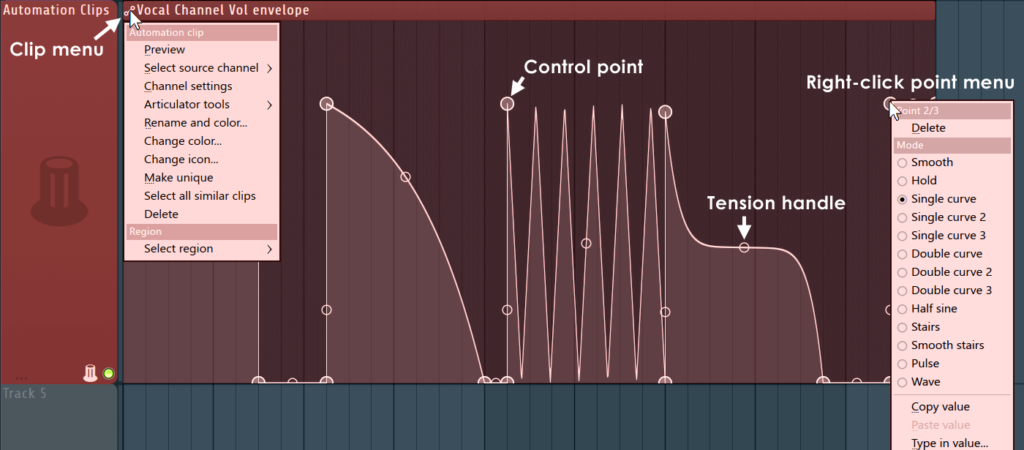
The automation clip will be added to the playlist as a new event. You can then edit the automation clip by dragging the control points up and down to change the value of the parameter.
You can also use the Curve editor to create more complex automation curves. The Curve editor allows you to select different types of curves, such as linear curves, sine waves, and exponential curves.
Best Practices for Using Automation
Here are some best practices for using automation in FL Studio:
- Start simple: Don’t try to automate too many parameters at once. Start with one or two parameters and gradually add more as you become more comfortable with automation.
- Use automation to create dynamics: Automation is a great way to create dynamics in your music. For example, you can automate the volume of a pad to create a crescendo or decrescendo, or you can automate the panning position of a sound to create a stereo image.
- Use automation to add effects: Automation can also be used to add effects to your tracks. For example, you can automate the cutoff frequency of a filter to create a wah-wah effect, or you can automate the resonance of a reverb to create a tremolo effect.
- Use automation to create transitions: Automation can be used to create smooth transitions between different sections of your song. For example, you can automate the volume of a track to fade it in or out, or you can automate the panning position of two tracks to cross-fade between them.
Conclusion
Automation is a powerful tool that can be used to create more dynamic and interesting music. By following the best practices outlined in this blog post, you can learn how to use automation to elevate your FL Studio productions to new heights.
I hope this blog post has been helpful. If you have any questions, please feel free to leave a comment below.
Additional Resources
- FL Studio Automation Guide: https://www.image-line.com/fl-studio-learning/fl-studio-online-manual/html/playlist_automationclip.htm
- FL Studio Automation Clip: https://www.youtube.com/watch?v=_FhYmrp4Too